How to Stake your Fetch.AI (FET) Tokens
By James Huang Updated October 31, 2024

Introduction
Fetch.ai, the crypto artificial intelligence project, announced a $100 million dollar investment into infrastructure for their ecosystem earlier this month and there are implications for FET stakers. We thought it would be beneficial to stake our own FET tokens and this guide walks through the new announcement and how to stake your FET tokens.
What are the new benefits to stakers?
The announcement brings additional rewards to stakers in the Fetch ecosystem. Today, stakers on the Fetch ecosystem already receive $FET tokens for staking, with APR hovering around 10%.
With this latest announcement, stakers will also be rewarded with Fetch Compute Credits starting March 7th, 2024. The Fetch Compute Credits are used to pay for GPU usage on the Fetch network, which will sport Nvidia’s A100, H100, and H200 GPUs.
How do you stake FET?
Fetch.ai migrated to the Cosmos network and as a result, there’s quite a bit of confusion on how to stake. Even Fetch’s own documentation confused us and we spent some time on Reddit to figure out how to actually do this. We will attempt to explain the step-by-step process of staking your FET tokens without having to amputate our own legs.
Step 1: Buy some FET tokens
You’ll first need to acquire some Fetch tokens. If you’ve already done this, pay attention to where you acquired your Fetch tokens. It has implications on how you stake them. The cleanest way to do this is to buy on Binance. Why Binance? Because Binance is the only company that migrated the Fetch.ai token from ERC-20 to their native chain on Cosmos. You can only stake FET on their Native chain. You cannot stake ERC-20 tokens anymore.
Important: If you buy tokens from anywhere else (i.e., Coinbase), they will be ERC-20 tokens. Do NOT send these tokens to your Fetch wallet because they are incompatible and will likely result in a loss of funds.
Step 2: Install a Fetch Compatible wallet and get your Fetch Wallet Address
You’ll need to download a wallet that can stake your FET tokens. We chose the Fetch Wallet listed on Fetch.ai’s website, but other options include Keplr and Cosmostation. Note that Fetch’s wallet is built by Keplr.
Make sure your Fetch wallet is selected on “fetchhub”. This is the network for Fetch’s ecosystem. Your wallet address will start with “fetch” and that’s how you’ll know you’re on the right network.
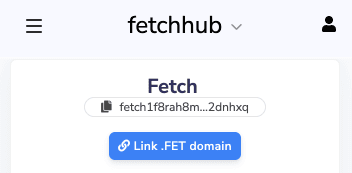
If you click on “Deposit” it will show you the following screen and automatically copy your address:
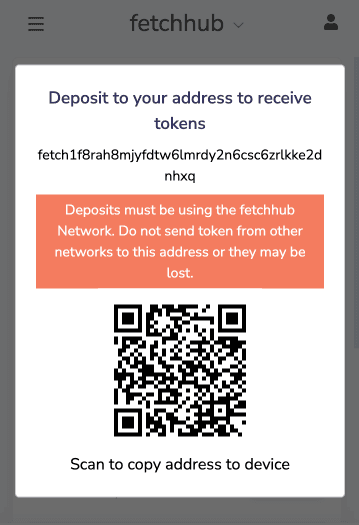
Now you have your address. Make sure to have that handy for the next step.
Step 3: Bridge your FET tokens from ERC-20 to Native Fetch Mainnet
If you purchased your Fetch tokens on Binance, you can simply send your Fetch tokens from Binance to the address you got from step 2. Then skip directly to step 4.
- The details outlined in Step 3 are required for everyone else. This is what we did because we bought our tokens on Coinbase.
- Transfer your FET tokens from your Coinbase account to your Ethereum wallet of choice. We tend to prefer Rabby over Metamask but either will work. Make sure you are sending tokens via the Ethereum network.
- These tokens will show up in your Ethereum wallet within a few minutes as long as Coinbase didn’t crash from the latest trading frenzy.
Once there, you’ll need to bridge your tokens from Ethereum mainnet to Fetch’s Native mainnet.
- The Token Bridge is located here: https://token-bridge.fetch.ai/
- Make sure you are going from ERC20 to Native as shown below:
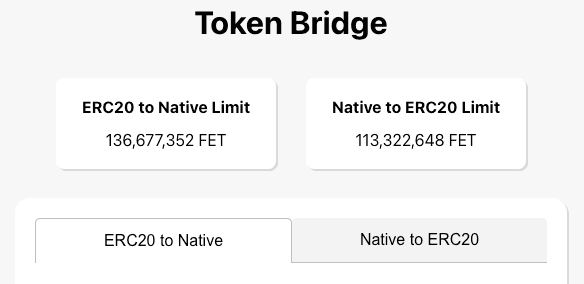
Once you connect your wallet, it should recognize the wallet address your FET tokens are located in.
- In the Native Address field, input your Fetch wallet address you acquired in step 2. Again, make sure the address is your fetchhub wallet address. It should start with “fetch”.
- For the amount, you’ll need to transfer at least 100 FET tokens via the bridge. It won’t take a smaller amount.
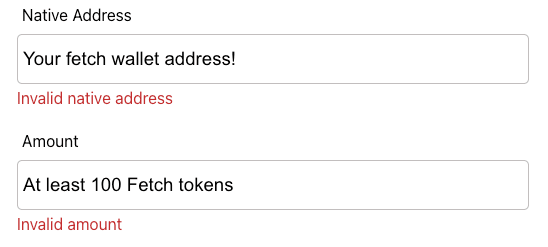
The FET tokens should arrive in your Fetch wallet of choice after a few minutes. It took about 5 minutes for our tokens to show up in our Fetch wallet (it disappeared from Rabby right away).
Step 4: Delegate & Stake Your FET Tokens
Are you getting tired? I am. But you’re almost there. Pull up the Fetch Wallet in your browser extension. Mash that Stake button like your life depends on it.

It will take a moment to load, but it will show all the providers you can stake with. We referenced this page, which shows your commission, APR, and their re-staking frequency for automatic compounding. Note, double check what the APR shows in the wallet extension because we did notice some discrepancies. We went with Allnodes because there’s a no commission fee for staking with them.
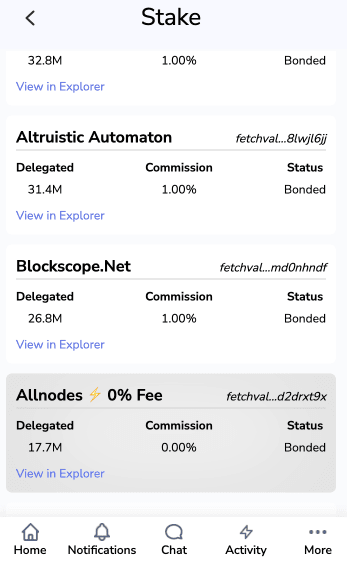
Once you’ve selected a pool, you’ll choose how much FET to stake. Remember to leave a little bit of FET so you can initiate the stake and claim rewards later, otherwise you’ll have to go through this convoluted process once again to get FET into your wallet.
Happy Staking!
Join the Beluga Brief
Dive deep into weekly insights, analysis, and strategies tailored to you, empowering you to navigate the volatile crypto markets with confidence.
Never be the last to know
and follow us on X


